Proven Methods to Fix Fiberglass Pool Leaks Underwater
Diagnosing Leaks in Southeast Wisconsin Fiberglass Pools
To repair a fiberglass pool leak underwater, pinpoint the leak with a dye syringe test, scrub the surrounding surface underwater with wet-dry sandpaper, and press a mixed two-part epoxy pool putty or polymer sealant firmly over the crack using a polyethylene plastic film barrier until it cures. This non-draining repair method quickly stops water loss around step seams, light niches, and minor surface cracks while keeping the pool full. In areas like Waukesha County and Walworth County, seasonal freeze-thaw cycles and dense clay soils subject pool shells to external ground pressures. Following a structured diagnostic procedure ensures you identify whether water loss is caused by evaporation, plumbing lines, or a shell crack before applying a patch.
Evaporation vs. Real Pool Leaks (The Bucket Test)
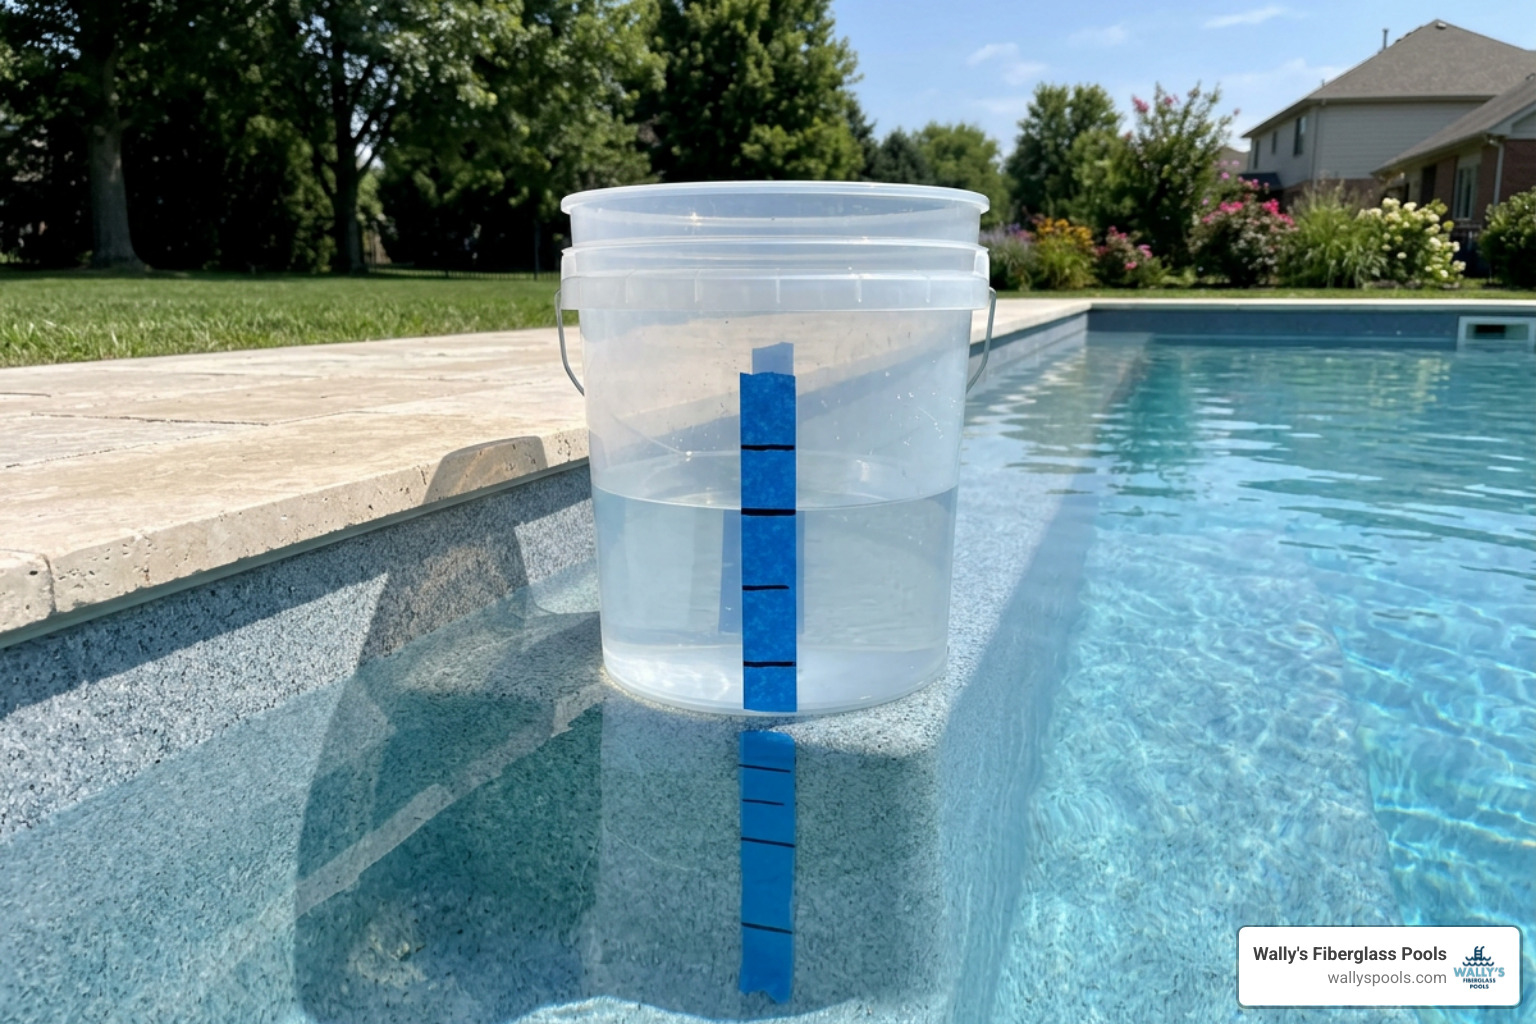
Hot summer days and breezy afternoons across Lake Geneva and Lake Country naturally cause pool water to evaporate. To determine whether you have an active leak or standard evaporation, perform a classic bucket test over a 24-hour period:
- Fill a standard 5-gallon bucket with pool water to about two inches from the top rim.
- Place the bucket on the top step of your fiberglass pool so the water inside the bucket stays close to the pool’s temperature.
- Mark the water level inside the bucket with a piece of waterproof tape or a permanent marker.
- Mark the pool’s water level on the outside of the bucket or directly on the skimmer faceplate.
- Leave the pool pump running in its normal operating cycle for 24 hours.
- Measure the drop in both the bucket and the pool.
If the water inside the pool drops noticeably faster than the water in the bucket—typically anything exceeding a quarter-inch per day—you have an active leak.
Pinpointing Shell Cracks, Plumbing Lines, and Fittings
Once you establish that water is escaping, the next phase is finding the precise failure point. You can narrow down the location with a systematic diagnostic routine:
- Pump-On vs. Pump-Off Isolation: Run the filtration system for 12 hours and log the water loss. Then turn the pump off completely for 12 hours. If your pool loses significantly more water while the pump runs, the leak is likely located in the pressurized return plumbing. If it loses more water when the system sits idle, the leak often resides in the suction lines (skimmer or main drain) or the pool shell itself.
- Precision Syringe Dye Testing: Turn off the pump so the water settles completely. Using a pool leak detection dye syringe (or standard food coloring in a pinch), slowly release a small cloud of dye within an inch of suspected areas. Test around the perimeter of the skimmer faceplate, return jet gaskets, pool light niches, steps, and visible cracks. If an opening has an active leak, the dye will be sucked directly into the void. For a detailed look at isolating hairline fissures, you can consult this DIY fiberglass leak restoration guide.
- Hydrostatic Relief Valve Inspection: Fiberglass pools feature a hydrostatic relief valve inside the main drain sump. This valve is engineered to let excessive groundwater seep into the pool so external pressure does not lift the floor. If a small stone, sand granule, or failing gasket prevents the valve from seating flat, water will escape downward into the soil under the pool floor.
- Light Conduit Check: The niche holding your pool light runs a conduit pipe back to the electrical junction box. The back of this niche is a frequent culprit for subtle leaks if the interior cord seal degrades over time.
Step-by-Step Guide to Fiberglass Pool Leak Repair
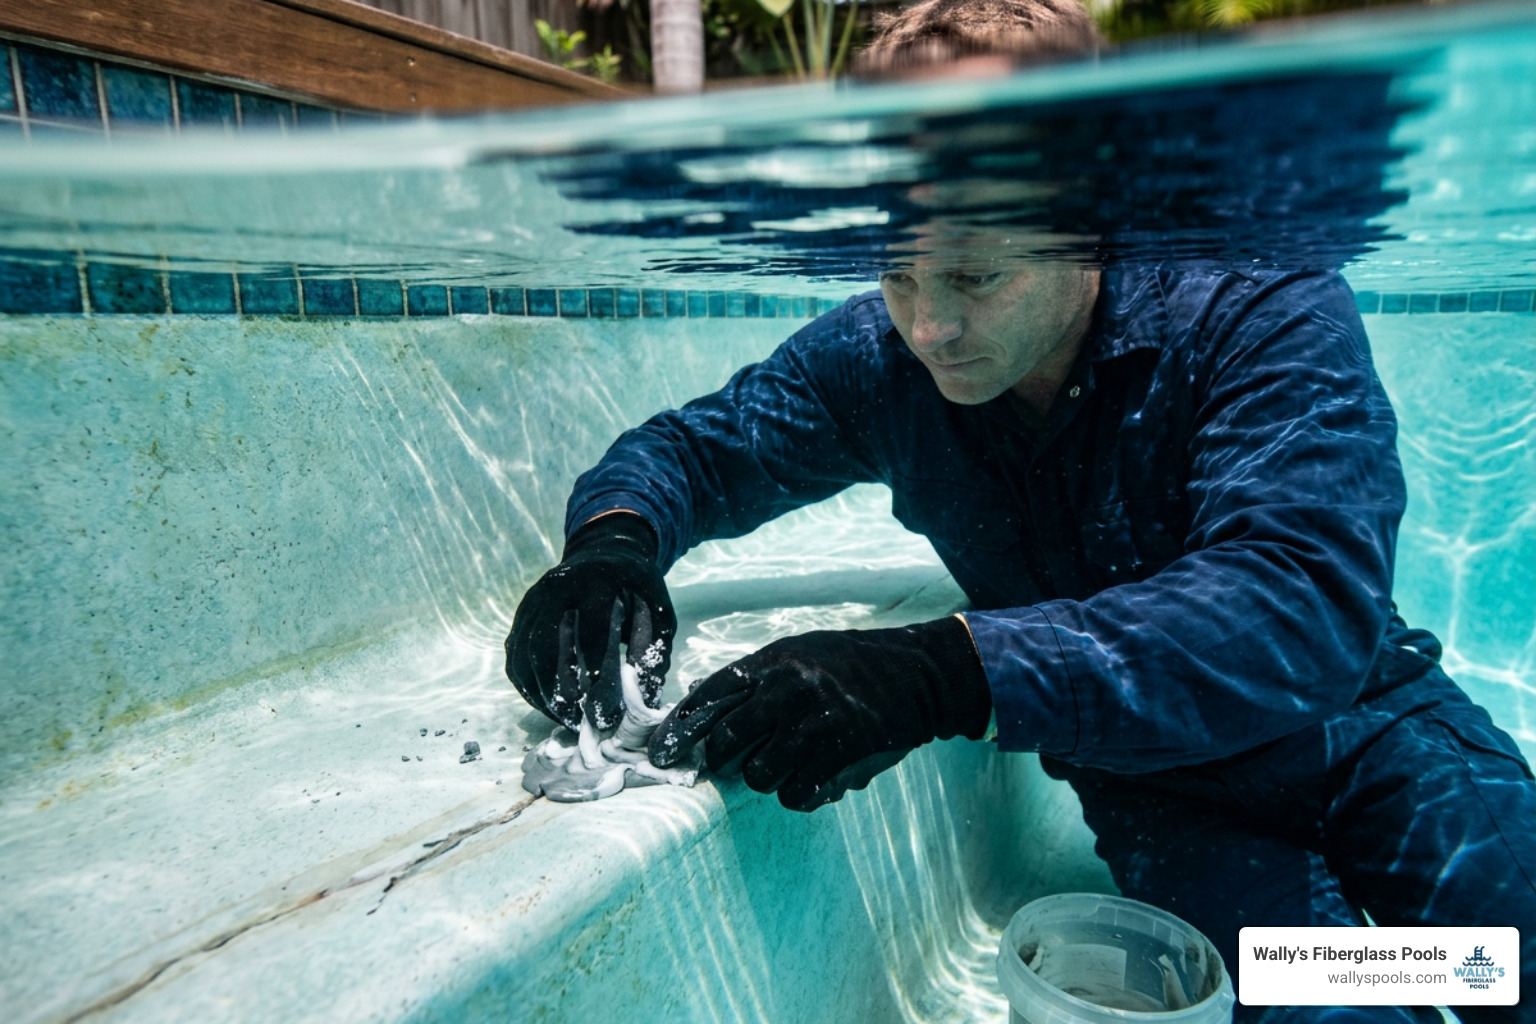
When you locate a minor leak on the shell, fitting, or step seam, an immediate underwater fix can halt water loss without requiring full drainage. Keeping the water inside the pool is critical because empty fiberglass shells are vulnerable to shifting from high groundwater levels.
For significant structural compromises, schedule professional fiberglass pool repair to restore the underlying core. For localized hairline cracks and fitting gaps, the following techniques allow you to seal the pool while keeping it full.
DIY Underwater Fiberglass Pool Leak Repair Techniques
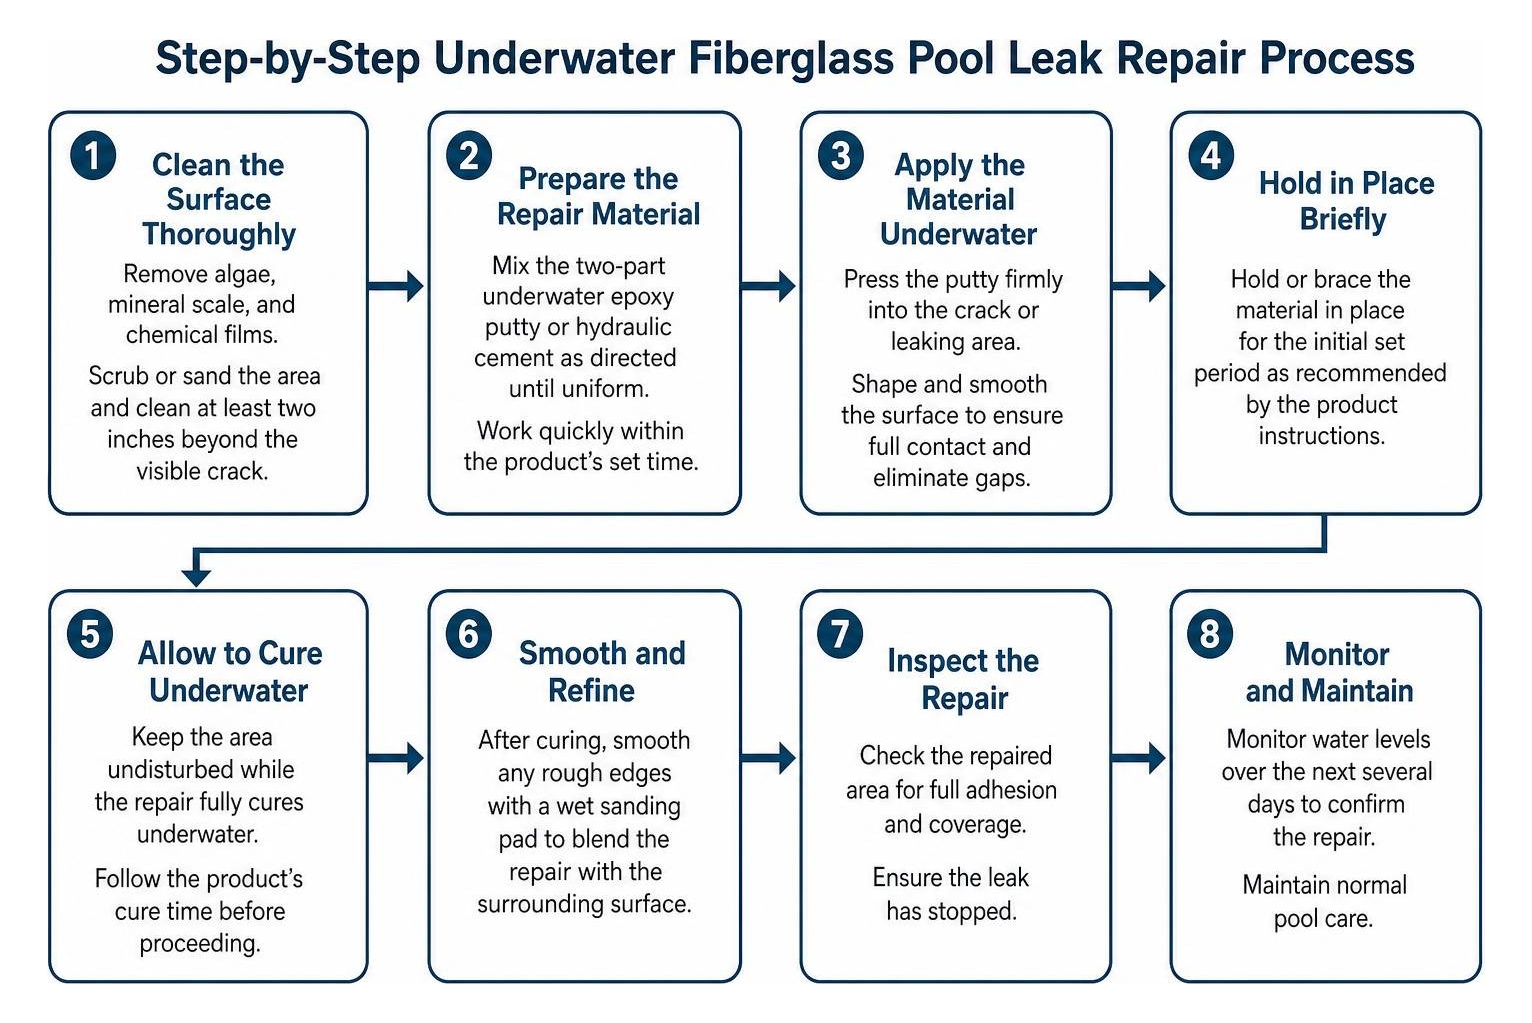
Modern pool chemicals and specialized hybrid epoxies make it possible to mix, apply, and cure compounds underwater. Follow these actionable steps to ensure a strong, long-lasting bond:
- Clean the Surface Thoroughly: Algae, mineral scaling, and chemical films prevent adhesives from bonding. Use an abrasive nylon scrubbing pad or wet-dry sandpaper (80- to 120-grit) directly underwater over the repair zone. Clean at least two inches beyond the visible crack in all directions.
- Select the Right Underwater Product: Use a high-density, two-part epoxy pool putty or a specialized underwater polymer sealant cartridge. These products are formulated not to wash away or dissolve in chlorinated or saltwater pools while setting.
- Mix the Two-Part Compound: Cut equal parts of the epoxy resin and hardener sticks. Knead the compound aggressively with your fingers (wearing nitrile gloves) until it achieves a uniform, streak-free color—usually turning from striped to solid white or off-white. You typically have 10 to 15 minutes of working time.
- The Polyethylene Film Application Method: When working with soft sealants or spreading epoxy smooth underwater, place the mixed compound onto a sheet of heavy-duty polyethylene plastic film. Press the compound firmly against the crack using the plastic barrier. Smooth it flat with a putty knife over the plastic, tapering the edges down to zero thickness. The plastic prevents the surrounding water turbulence from scouring the patch. You can carefully peel the film away once the initial cure begins. Learn more about specialized underwater pool patching techniques to handle tricky angles along steps or light niches.
- Allow Full Chemical Cure: Most underwater pool putties achieve an initial set in 20 to 30 minutes, hardening completely into a rigid bond within 24 hours. Keep pool cleaners, automatic vacuums, and heavy foot traffic away from the area during this window.
Repairing Cosmetic Spider Cracks vs. Deep Shell Fractures
Not every crack in a fiberglass pool leaks water. Understanding the structural layers of a composite pool shell helps you avoid unnecessary panic.
Cosmetic spider cracks are fine, web-like hairline fractures that form strictly within the pool’s outer gelcoat layer. They occur when localized stress or thermal expansion flexes the gelcoat beyond its elastic limit. If a dye test shows no movement of water into the spider crack, the structural integrity of the shell remains intact, and the issue is purely aesthetic.
Deep structural cracks, by contrast, penetrate through both the top gelcoat layer and the woven fiberglass composite backing underneath. These fissures develop from shifting backfill, ground settling, or improper lifting during original placement. Structural fractures demand mechanical grinding, multi-layer fiberglass matting, and catalyzed structural resin to halt crack propagation.
Cost Factors and Durability of Underwater Patches
When evaluating repair options, pool owners must weigh short-term budget fixes against comprehensive, permanent restorations.
| Repair Scope & Method | Typical Project Cost | Expected Lifespan | Primary Application |
|---|---|---|---|
| DIY Underwater Epoxy Kit | $50 – $200 | 1 – 3 Years | Small fitting leaks, emergency patch, temporary step crack seal |
| Minor Professional Crack Repair | $300 – $1,500 | 5 – 10 Years | Localized injection, precision color-matched gelcoat repair |
| Structural Crack & Wall Repair | $2,500 – $6,000 | 10 – 20+ Years | Shell fracture reinforcement, backfill void filling, multi-mat rebuild |
| Osmotic Blister Remediation | $3,000 – $8,000 | 10 – 15+ Years | Draining, opening blisters, applying vinyl-ester epoxy barrier coat |
| Complete Gelcoat Resurfacing | $5,000 – $12,000 | 10 – 15 Years | Marine-grade gelcoat application at 25–30 mils across entire pool |
| Full Structural Resurfacing | $12,000 – $20,000 | 15 – 30 Years | Complete multi-layer fiberglass relamination + topcoat restoration |
Temporary Epoxy Putty vs. Long-Term Gelcoat Restoration
Two-part underwater epoxy putties serve as reliable emergency stopgaps. They cure hard, prevent moisture from degrading surrounding soil, and buy you valuable time until the end of the swimming season. However, epoxy putties are rarely permanent structural solutions. Over several seasons of Wisconsin winter freezes and summer heat waves, epoxy expands and contracts at a different rate than the fiberglass shell, eventually causing the bond edge to loosen.
Long-term restoration requires high-grade marine gelcoat applied at a durable 25 to 30 mils thickness. Standard pool paint offers a thin 3 to 5 mils coating that typically fails and peels within 2 to 5 years, often trapping water against the laminate and inducing blister formation. Marine gelcoat chemically bonds to the structural fiberglass, incorporating UV inhibitors that resist degradation from high sanitizer levels and sunlight for 10 to 15 years.
Professional Fiberglass Pool Leak Repair Costs and Lifespan
When hiring an experienced professional, the diagnostic scope extends beyond patching a visible hole. A comprehensive repair involves electronic acoustic leak listening, closed-circuit pressure testing on every isolated plumbing loop, and soil stability assessments around the pool perimeter.
Minor localized repairs managed by a specialist run between $300 and $1,500. If the pool has suffered structural shifts requiring core lamination, costs generally range from $2,500 to $6,000 and take 3 to 5 business days to complete. While professional structural repairs carry a higher initial price tag than a DIY kit, they restore original tensile strength, include material warranties, and protect your home’s surrounding hardscapes and decking from undermining washouts.
Preventing Future Fractures and Soil Pressure Damage
A fiberglass swimming pool is a flexible, engineered composite structure designed to move slightly with natural ground pressures. Preventing future cracks requires stabilizing the environment surrounding the exterior of the shell.
Managing Freeze-Thaw Ground Movement and Hydrostatic Pressure
In Southeast Wisconsin, freezing temperatures penetrate deep into the ground during winter. Wet, expansive clay soils expand significantly when frozen, applying immense lateral pressure against pool walls.
The most critical factor in preventing shell cracks is using clean, angular gravel backfill during proper fiberglass pool installation. Unlike sand or native soil, angular gravel does not hold water, does not shift when wet, and provides a free-draining channel that protects the pool walls from soil pressure.
The Golden Safety Rule: Never drain a fiberglass pool completely without installing a dedicated dewatering sump well to relieve external groundwater tables. The water inside your pool provides the outward hydrostatic pressure needed to counterbalance groundwater on the outside. Draining the water eliminates this internal resistance, which can cause floor bulges, wall fractures, or catastrophic shell lifting.
Water Chemistry and Gelcoat Care in Wisconsin
Maintaining water parameters within strict operating ranges protects the inner gelcoat surface from premature embrittlement, chalking, and osmotic blisters. Follow these basic water quality targets as part of your routine fiberglass pool maintenance:
- pH Level: Maintain strictly between 7.4 and 7.6. Acidic water (below 7.2) attacks the gelcoat surface, stripping plasticizers and making the resin brittle, while alkaline water (above 7.8) precipitates calcium scale that masks emerging cracks.
- Total Alkalinity: Keep balanced between 80 and 120 ppm to prevent sharp pH spikes.
- Calcium Hardness: Maintain between 200 and 400 ppm. Soft water leaches minerals directly out of surface coatings.
- Sanitizer Management: Avoid dumping concentrated, undissolved dry chlorine shock directly onto the fiberglass floor. Concentrated chemicals sinking to the bottom can bleach and craze the gelcoat, creating micro-fissures over time.
Frequently Asked Questions About Pool Leak Fixes
Can you permanently fix a pool leak without draining the shell?
Small leaks around return jets, light niches, skimmer throat gaskets, and surface step cracks can be repaired underwater using specialized two-part epoxy putties and hybrid underwater sealants. However, deep structural fractures that run through the composite shell cannot be permanently restored underwater.
Rebuilding damaged structural laminates requires dry mechanical grinding, laying multiple layers of fiberglass mat saturated with catalyzed resin, and curing in a dry, temperature-controlled environment. Always consult a specialist before draining to avoid groundwater damage.
How do you know if a crack in a fiberglass pool goes all the way through?
You can test crack severity using two simple diagnostic checks:
- The Fingernail / Pick Test: Run a gloved fingernail lightly over the crack. Surface-level spider cracks feel like faint scratches. Deep structural fractures create a distinct separation or uneven ledge where one side of the laminate sits slightly higher than the other.
- The Stationary Dye Pull Test: With all circulation pumps turned off and the pool water completely still, release a heavy droplet of dye directly over the crack line. If the dye drifts casually across the surface, the crack is superficial crazing. If the dye is rapidly sucked inward through the crack, the fracture extends through the entire shell into the backfill.
How long do underwater pool patches last in freezing climates?
In climates subject to deep freeze-thaw cycles like Southeast Wisconsin, a DIY underwater epoxy putty patch typically lasts between 1 and 3 seasons.
While the epoxy remains waterproof, the thermal expansion rate of cured epoxy differs slightly from the flexible composite shell. Over repeated winter freezes, the bond line experiences stress and will eventually develop micro-channels. For this reason, underwater patches should be viewed as reliable seasonal fixes to protect your pool until a permanent, structural repair can be performed.
Conclusion
A pool leak does not mean your backyard investment is ruined. By acting quickly, running a structured bucket test, and using dye testing to isolate the source, you can stop water loss and protect your pool’s foundation. While underwater putties are great for fast, temporary repairs, complex cracks and shifting shells require experienced handling to ensure long-term stability.
At Wally’s Fiberglass Pools, we specialize in helping homeowners throughout Lake Country, Waukesha County, the Milwaukee metro area, and Walworth County protect, maintain, and enjoy their swimming pools through every season. Whether you are dealing with a frustrating leak, planning a new pool project, or need seasonal guidance, reach out to us for expert fiberglass swimming pool solutions tailored to Wisconsin backyards.