
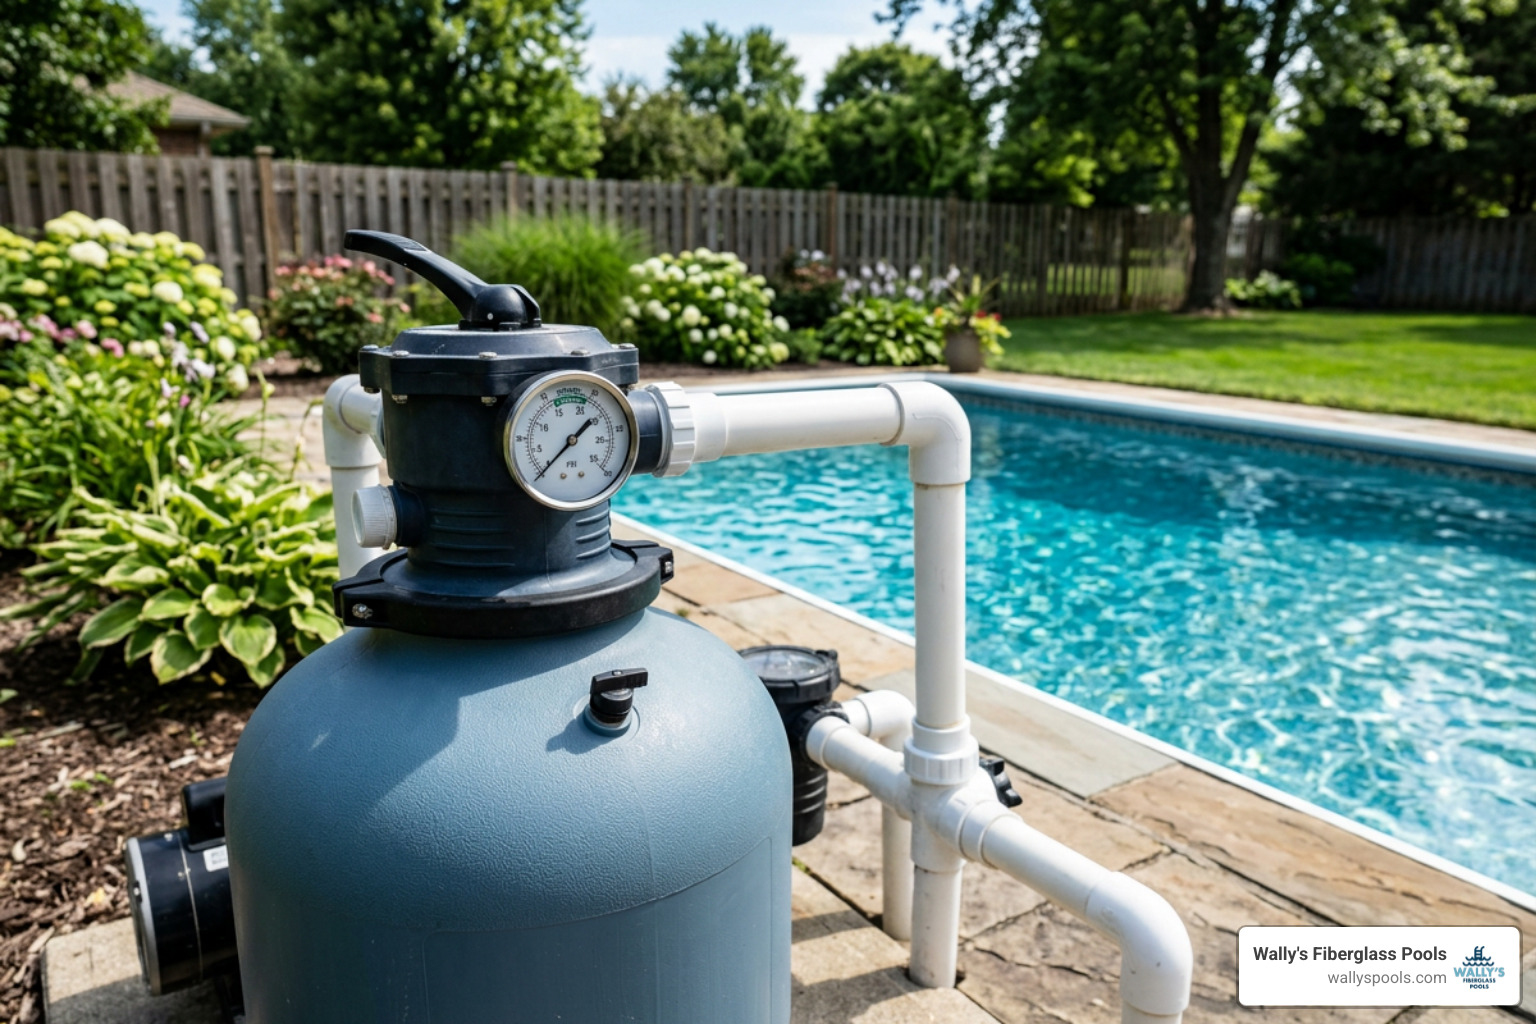
7 Proven Tips for Hayward Sand Filter Maintenance
Keep Your Pool Sand Filter Clean for Clearer Water
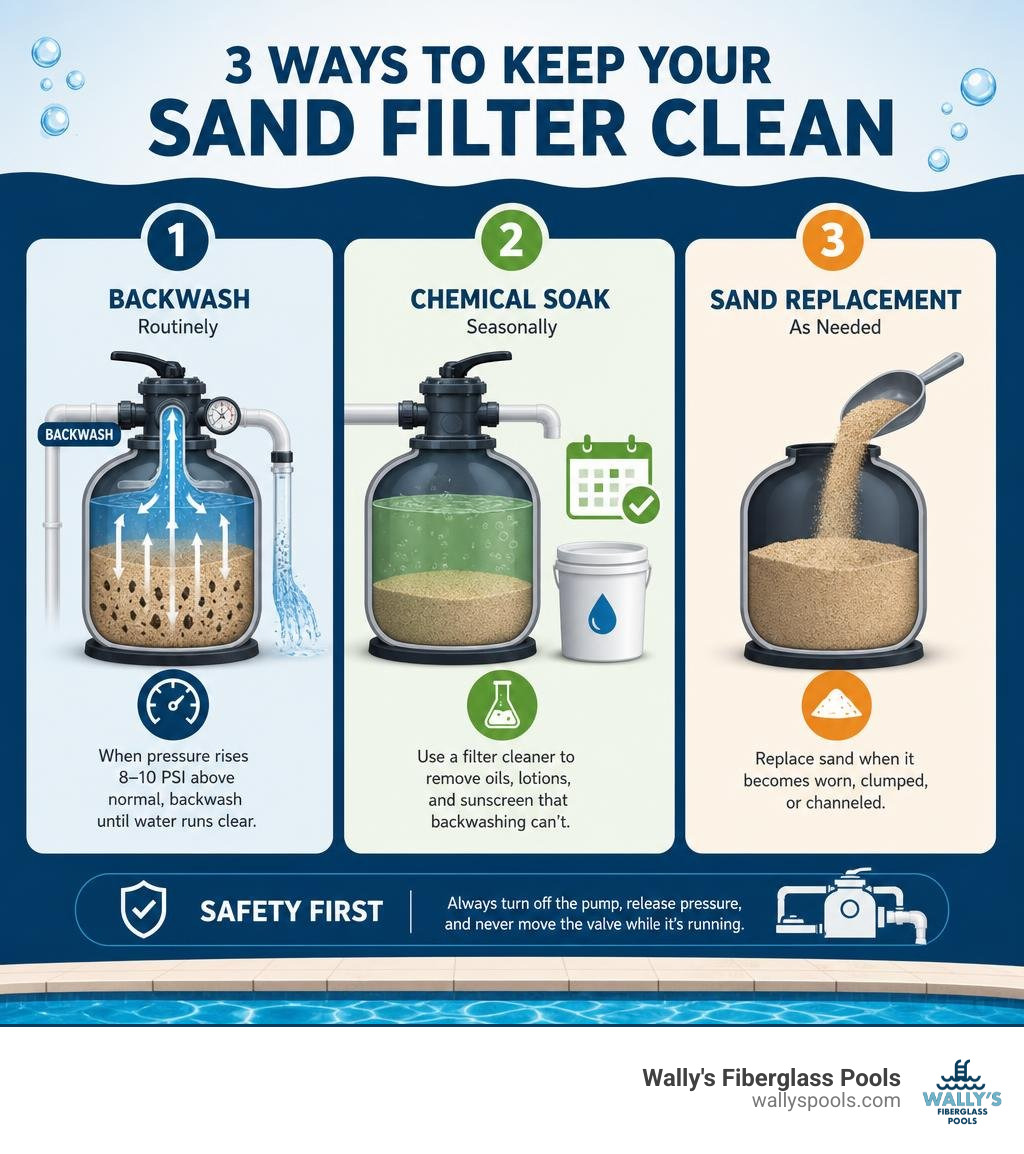
To clean a pool sand filter, backwash it when the pressure gauge rises about 8-10 PSI above its normal clean reading. Run the pump on Backwash until the sight glass is clear, then use Rinse for about 30 seconds before returning to Filter. If pressure stays high or water remains cloudy, use a pool-safe filter cleaner to remove oils, lotions, and sunscreen that backwashing cannot flush out.
Sand filters are simple and durable, but they still need attention. They generally capture debris in the 20-40 micron range, helping fiberglass pool owners across Southeast Wisconsin keep water clear through pollen season, busy swim weekends, and fall leaf drop.
The key is to use the right level of cleaning: routine backwashing for trapped debris, a seasonal chemical clean for oily buildup, and media replacement when sand becomes worn, clumped, or channeled. Never move a multiport valve while the pump is running, and always shut off power and relieve pressure before opening the filter.
I’m Wally Haines from Wally’s Pools, a Sussex, Wisconsin-based fiberglass pool specialist, and the next tips will help you protect your equipment and maintain clear water in Lake Country and beyond.
Clean pool sand filter terms you need:
Sand Filter Maintenance Levels: Backwashing vs. Deep Cleaning vs. Replacement
Every pool filtration system relies on clean media to capture suspended contaminants, but not all clogs are identical. Understanding the difference between mechanical rinsing, chemical degreasing, and total media replacement prevents unnecessary equipment strain and keeps your pump running efficiently.
When your filter operates under normal conditions, water passes down through the sand bed, trapping microscopic debris down to 20–40 microns (or roughly 40–50 microns depending on media settling—about the width of the tip of a fine ballpoint pen). Over time, pressure builds as particles pack together. If simple dirt is the culprit, a quick backwash flushes the media. However, water-resistant sunscreens, body oils, and cosmetic products form an insoluble, sticky film over individual sand grains that water pressure alone cannot dislodge.
Left unaddressed, this oil slick causes “channeling”—a failure mode where water carves high-velocity ruts through the sand bed, bypassing the filtration media entirely and returning dirty water directly back into the pool. Integrating these three maintenance tiers into your routine fiberglass pool maintenance ensures your water stays polished throughout the swimming season.
| Maintenance Tier | Primary Purpose | Frequency | Key Triggers |
|---|---|---|---|
| Level 1: Backwashing | Flushes out trapped physical dirt, leaves, and suspended particulates | Every 2 to 4 weeks during peak swim season | Pressure gauge rises 8–10 PSI above baseline; flow drops ~30% |
| Level 2: Chemical Cleaning | Strips organic grease, bather oils, sunscreen, and mineral scale | Once per season (or mid-season if water clouds) | Backwashing fails to lower operating pressure back to clean baseline |
| Level 3: Sand Replacement | Restores media filtration geometry and inspects internal tank parts | Every 5 to 7 years | Rounded, smoothed sand grains, persistent channeling, or calcification |
7 Proven Tips to Clean Pool Sand Filter Equipment for Peak Performance
Applying structured, preventative maintenance to your pool filter protects your pump’s motor from excessive head pressure, maximizes turnover rates, and preserves water clarity during our hot Wisconsin summers.
1. Monitor Pressure Gauges and Master the Backwash Cycle
The single most reliable indicator that your sand bed needs attention is your pressure gauge. When you first install fresh sand or complete a thorough seasonal opening, note your “clean baseline” pressure (typically between 10 and 15 PSI on most residential systems). Write this baseline number directly on the tank using waterproof tape.
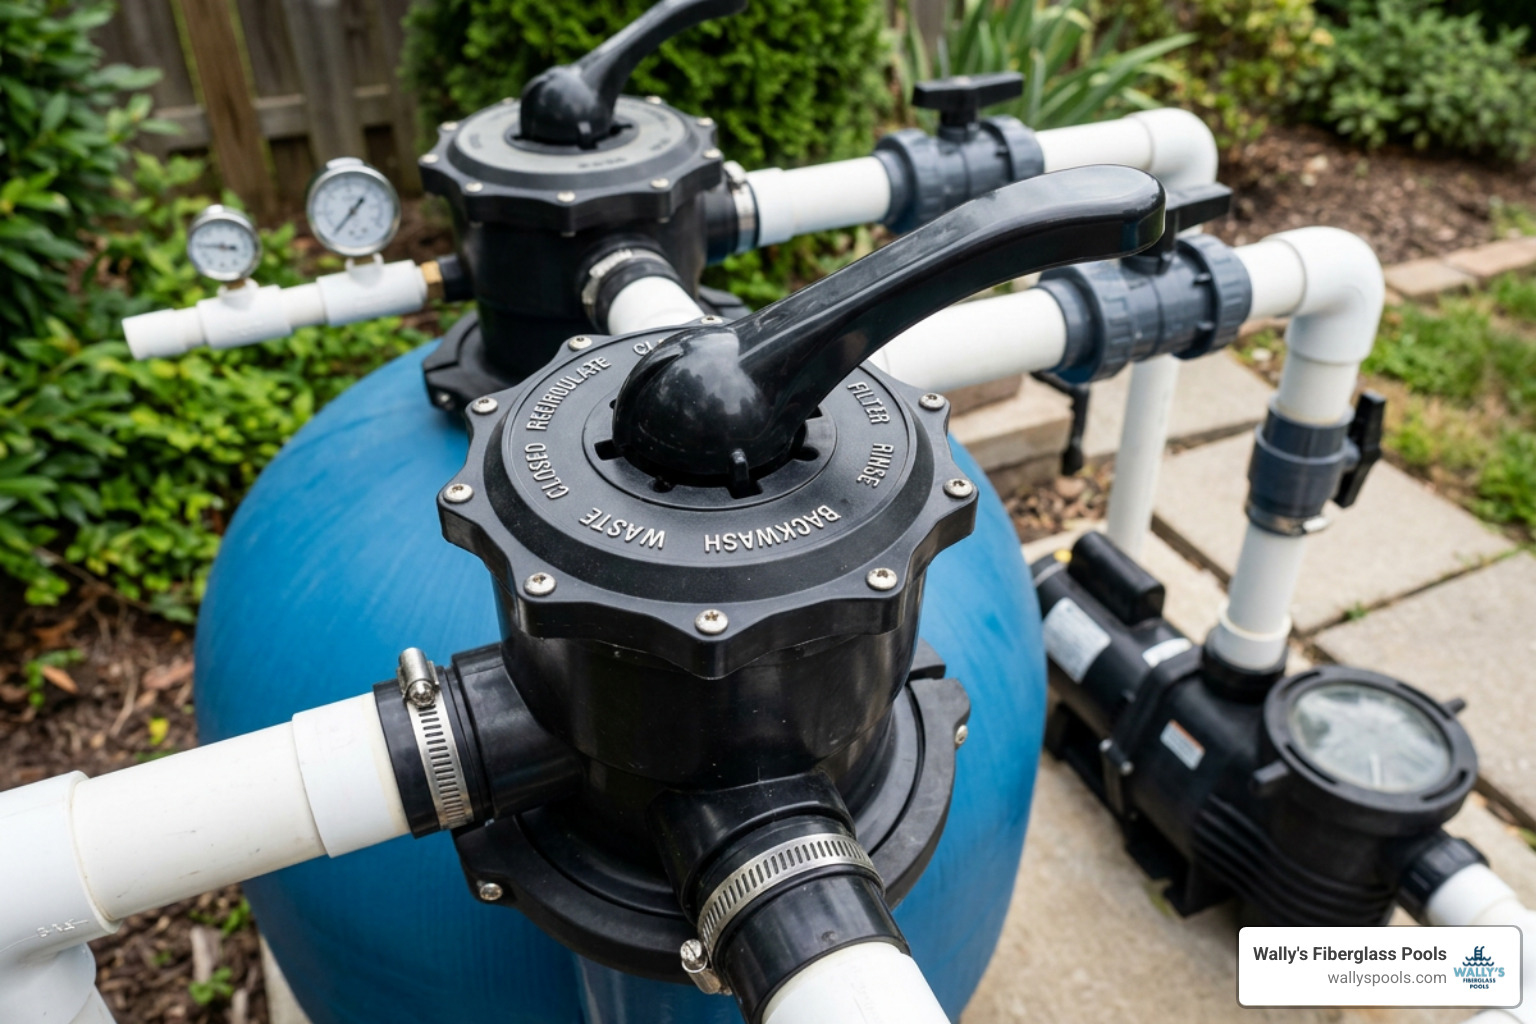
When organic debris and fine silt accumulate, the restriction increases internal tank pressure. You should execute a backwash cycle as soon as the gauge reads 8–10 PSI above your baseline or when you notice roughly a 30% reduction in water velocity from your pool return jets.
Follow this standard backwash sequence:
- Turn off the pool pump at the breaker or switch. Never rotate the multiport valve handle while the pump is actively running, as this will tear the internal spider gasket and cause internal leaks.
- Depress the multiport valve handle fully and rotate it to the BACKWASH position.
- Unroll your backwash discharge hose to an approved drainage area away from building foundations and delicate garden beds.
- Turn the pump back on. Water will flow backward up through the lower laterals, lifting and expanding the sand bed to flush trapped debris out through the waste line.
- Watch the clear sight glass on the side of the multiport valve. The water will initially run cloudy or dark. Continue running the pump until the sight glass runs completely clear (typically 2 to 3 minutes).
- Shut off the pump. Rotate the handle to the RINSE setting.
- Turn the pump on and run it for 30 seconds. The rinse cycle sends water downward through the sand bed to re-pack and settle the grains while flushing any leftover particulate out the waste pipe instead of into your clean pool.
- Shut off the pump, set the valve back to FILTER, and restart the system. Always verify manufacturer-specific instructions in your Top Mount Sand Filter User Manual for exact valve designations.
2. Chemically Clean Pool Sand Filter Beds to Strip Oils
Backwashing handles inorganic dirt, but it cannot dissolve greasy bather waste. Sunscreens, skin oils, and airborne pollen coat the silica grains in a waxy sheen that repels water. When backwashing only lowers your pressure gauge by 2–3 PSI instead of returning it to baseline, perform a chemical soak.
Using a specialized, non-foaming citrus or enzyme-based filter cleaner breaks down non-polar hydrocarbon chains without damaging your tank’s internal PVC plumbing.
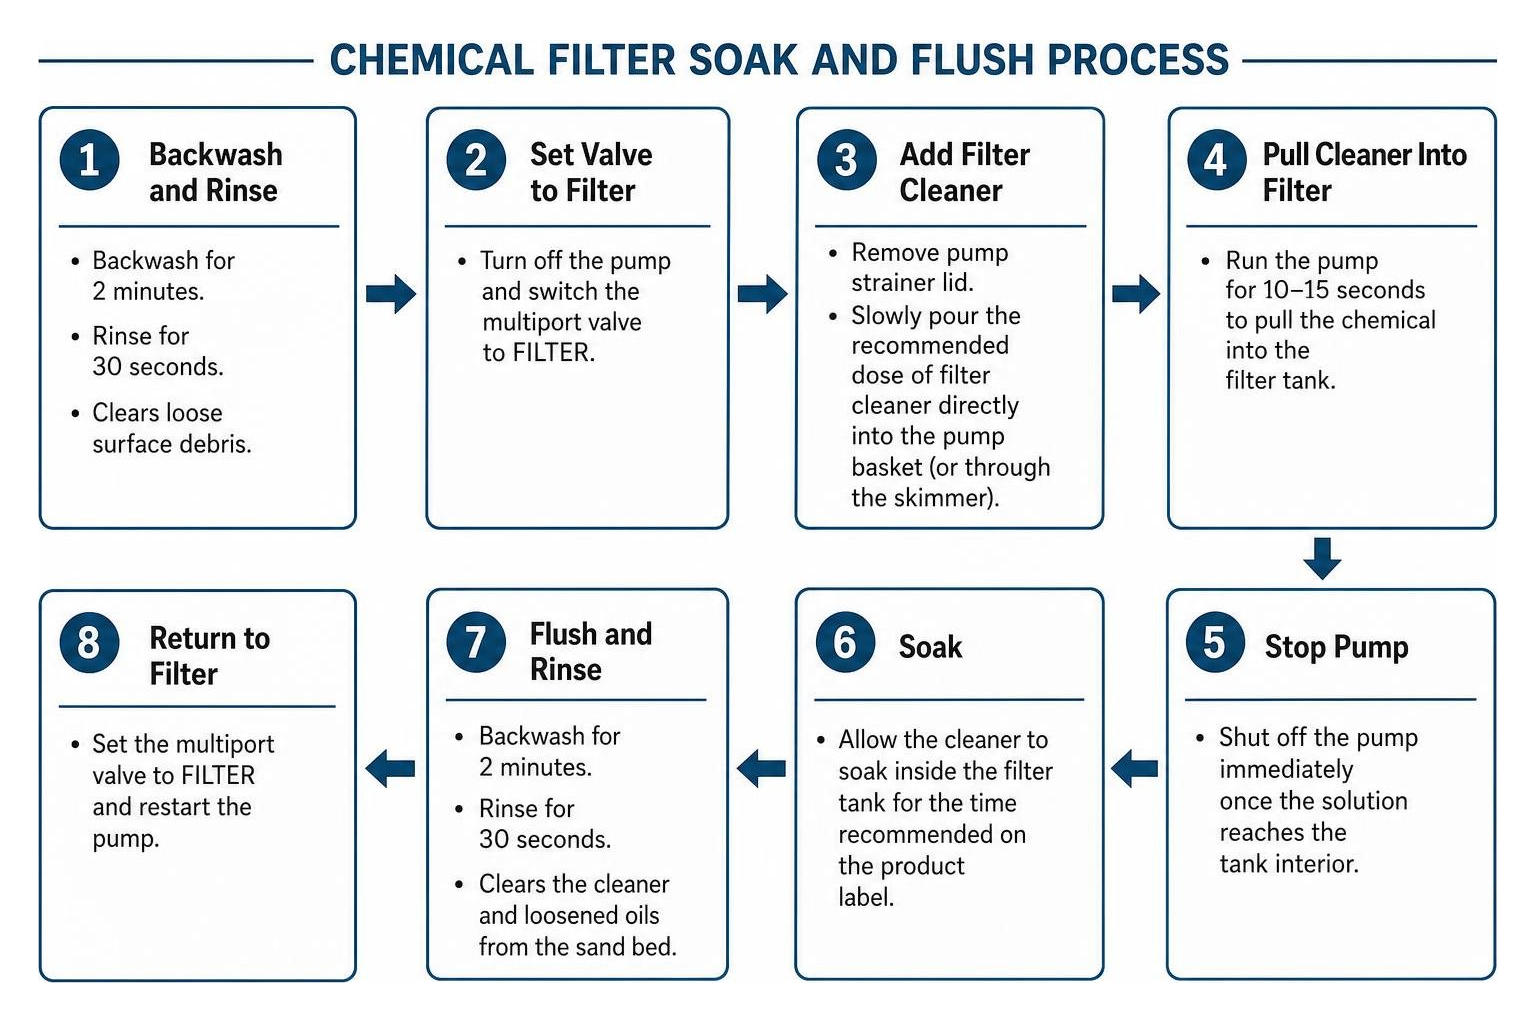
To chemically strip the sand bed:
- Perform a standard 2-minute backwash and a 30-second rinse to clear loose surface debris.
- Turn off the pump and switch the multiport valve to the FILTER position.
- Remove the pump strainer lid and slowly pour the recommended dose of pool filter cleaner directly into the pump basket (or through the skimmer while the pump runs for 10–15 seconds to pull the chemical into the filter tank).
- Shut off the pump immediately once the solution reaches the tank interior.
- Allow the chemical solution to soak within the sand bed for 8 to 12 hours (or overnight). This gives the active enzymes time to dissolve oils and loosen calcified scale deposits.
- The following morning, set the valve to BACKWASH and run the pump for at least 3 to 5 minutes to flush all dissolved grease and chemical residue directly to waste. Finish with a 30-second RINSE before returning to regular filtration.
Pairing this process with a balanced pool chemical maintenance routine ensures your water stays sanitarily balanced and crystal clear all summer long.
3. Deep Clean Pool Sand Filter Tanks and Protect Laterals
Even with regular backwashing and chemical treatments, sand beds can develop dense clumps called “mudballs” or deep bypass ruts along the tank walls. An annual mechanical deep clean at the beginning of the swim season restores the integrity of the sand bed.
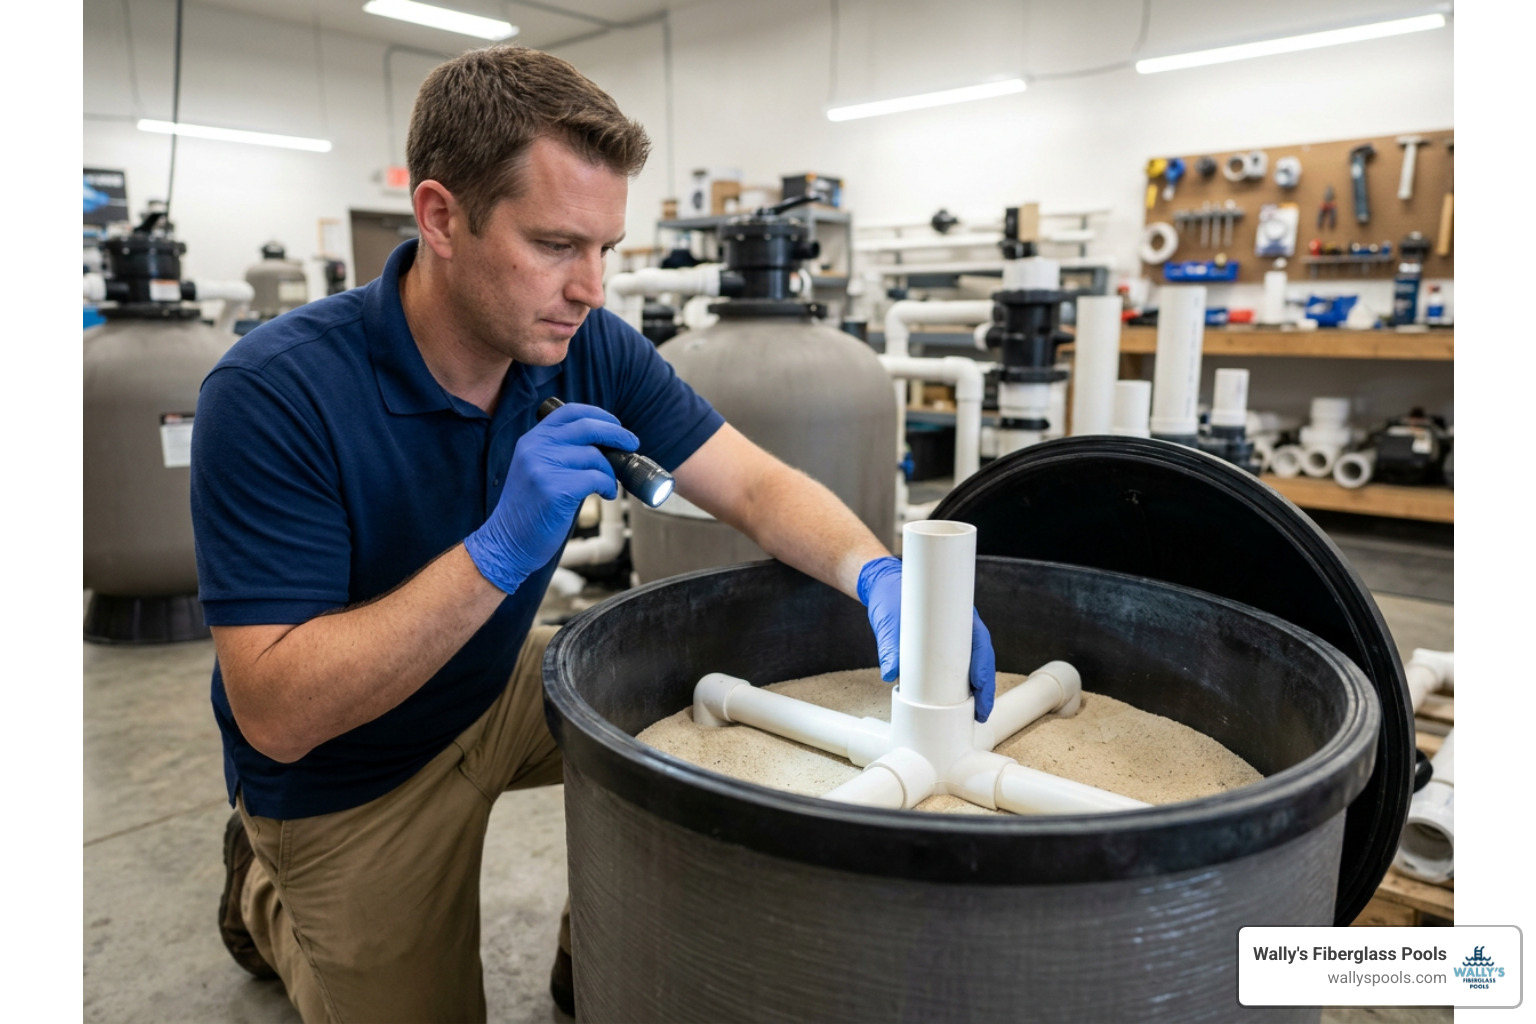
To safely deep clean the tank interior without damaging fragile internal components:
- Turn off electrical power and shut off the isolation valves connecting the filter to the pool.
- Open the manual air bleeder valve on top of the multiport assembly to relieve all internal pressure.
- Remove the top clamp ring or unscrew the top-mount multiport valve. Carefully lift the valve straight up off the central standpipe.
- Inspect the top of the sand bed. If you see calcified crusted layers or greasy debris, use a small plastic cup to skim and discard the top 1–2 inches of fouled sand.
- Insert a standard garden hose (running on low-to-medium water pressure) down into the sand bed.
- Gently push the hose downward while water flows, moving it in slow circular motions to fluidize the sand. Watch for buried debris, hair, and silt to rise to the top and overflow out of the open tank collar.
- Exercise extreme caution near the bottom of the tank. The lower lateral assembly features slotted plastic fingers designed to hold back sand while allowing water to pass. Striking these laterals with the end of a rigid hose or broom handle can crack the plastic, leading to sand blowing back into your pool.
- Continue flushing until the overflow water running out of the tank neck is completely clear. Reassemble the multiport valve, lubricating the neck O-ring with silicone-based pool lubricant.
4. Choose #20 Silica Sand and Calculate Accurate Bed Weight
When it is time to replace media, never cut corners on product selection. Swimming pool sand filters require #20 standard silica sand, which has a precisely calibrated particle diameter of .018 to .022 inches (0.45 to 0.55 mm) and a uniformity coefficient of 1.75 or lower.
Never use play sand, masonry sand, or beach sand in a pool filter. These materials contain fine dust that will immediately bypass internal laterals, cloud your pool water, and permanently score the mechanical shaft seals inside your pump.
Always check your filter’s data plate for exact volume requirements. A standard 24-inch diameter tank typically requires 200 lbs of sand (four 50-lb bags). When filling the tank, ensure you leave approximately 6 to 8 inches of headspace between the top of the leveled sand bed and the top lip of the tank. Overfilling prevents proper water distribution, while underfilling leads to premature channeling and poor filtration.
(Note: Recycled glass filter media is an alternative upgrade that filters down to 2–5 microns and lasts up to 8–10 years, though it carries a higher initial cost than standard silica sand.)
5. Follow Safe Pressure Relief and System Start-Up Steps
A swimming pool filter is a sealed pressure vessel. Neglecting safety steps during maintenance can result in mechanical failure or rapid pressure release.
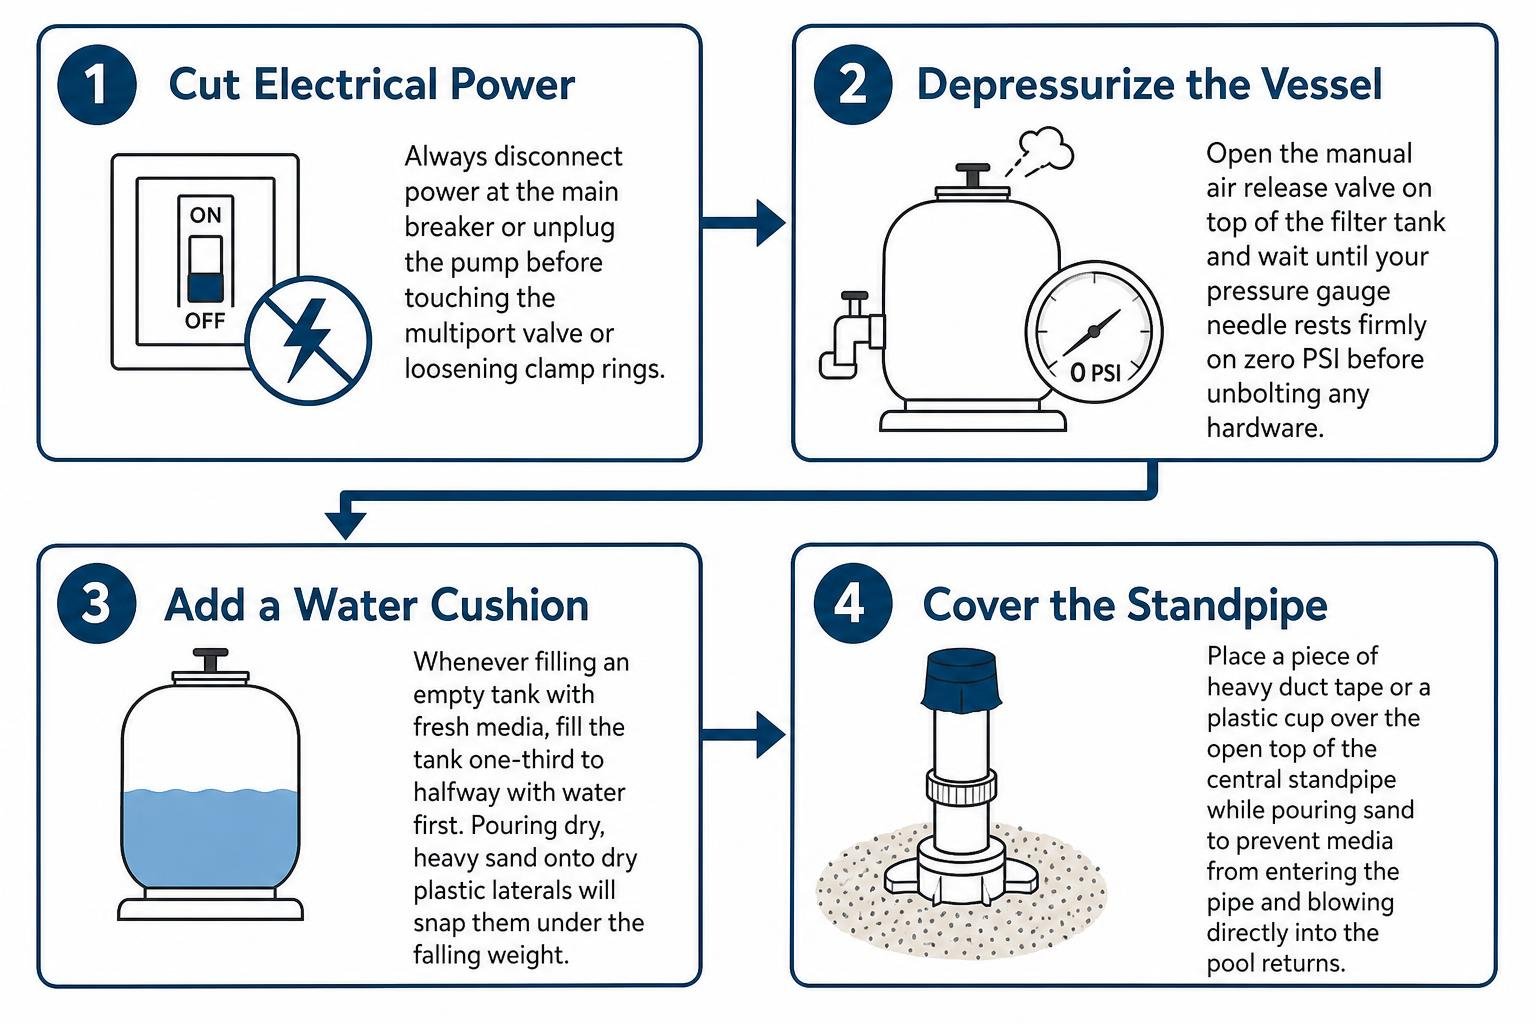
Always execute these safety and start-up protocols:
- Cut Electrical Power: Always disconnect power at the main breaker or unplug the pump before touching the multiport valve or loosening clamp rings.
- Depressurize the Vessel: Open the manual air release valve on top of the filter tank and wait until your pressure gauge needle rests firmly on zero PSI before unbolting any hardware.
- Add a Water Cushion: Whenever filling an empty tank with fresh media, fill the tank one-third to halfway with water first. Pouring dry, heavy sand onto dry plastic laterals will snap them under the falling weight.
- Cover the Standpipe: Place a piece of heavy duct tape or a plastic cup over the open top of the central standpipe while pouring sand to prevent media from entering the pipe and blowing directly into the pool returns.
- Initial Flush: After reassembly, never start up directly in Filter mode. Set the valve to BACKWASH first for 2 to 3 minutes to wash out fine sand dust, followed by a 1-minute RINSE, before placing the system in normal service.
If you prefer professional assistance with tank servicing, our team provides specialized inground fiberglass pool service throughout Southeast Wisconsin to keep your equipment running safely.
6. Troubleshoot Sand in Pool Water and Cracked Laterals
Finding piles of fine sand on the floor of your pool—especially directly beneath the return jet fittings—is a clear sign of an internal mechanical failure within the filter tank.
If sand blows back into your pool, walk through this diagnosis:
- Did you recently add or replace sand? If the central standpipe was left uncovered during filling, sand may have spilled directly down the pipe. Vacuum the sand to waste and see if the problem stops after 24 hours.
- Is a lower lateral cracked? The lateral assembly at the base of the tank has narrow slots calibrated to 0.010 inches. If an individual lateral splits from age, water hammer, or physical impact during sand loading, sand will enter the return plumbing continuously.
- Is the standpipe cracked or unseated? Thermal expansion or twisting the multiport valve during installation can crack the center pipe or unseat it from the lower hub.
To fix a cracked lateral:
- Turn off power, relieve pressure, and drain the water using the tank’s bottom drain plug.
- Use a wet/dry shop vacuum to suction the sand out of the tank until the bottom lateral assembly is exposed.
- Carefully unthread or fold up the lateral arms, inspect each one under bright light for hairline fractures, and replace any damaged sections (or install a fresh lateral hub assembly).
- Add the required water cushion, tape the standpipe, and refill the tank with fresh #20 silica sand.
7. Winterize Equipment for Wisconsin Freeze-Thaw Protection
In Southeast Wisconsin, winter conditions require thorough equipment winterization to protect your investment. Water expands by roughly 9% when it freezes; trapped water inside a fiberglass or thermoplastic sand filter will split the tank body, crack the multiport valve, and shatter the internal laterals.
Follow these cold-climate winterization steps:
- Complete a final 3-minute backwash and 30-second rinse cycle at the end of the season to clear all organic matter.
- Shut off electrical power to the pump at the breaker panel.
- Remove the threaded drain plug at the bottom base of the filter tank. Store the drain cap and its small rubber O-ring safely inside the pump strainer basket for spring.
- Allow the water to drain completely from the tank. (Because sand holds moisture, this draining process can take several hours).
- Remove the pressure gauge and sight glass from the multiport valve and store them indoors to prevent delicate internal diaphragms from freezing.
- Depress the multiport valve handle and position it on the special WINTER (or Winterize) setting. This elevates the internal diverter, venting all internal ports to prevent water from remaining trapped against the rubber spider gasket.
For comprehensive seasonal opening and closing support across Waukesha and Walworth counties, consider signing up for our seasonal pool maintenance plans.
Frequently Asked Questions About Sand Filter Cleaning
How often should pool filter sand be replaced?
Under normal residential operating conditions, pool filter sand should be completely replaced every 5 to 7 years. Over years of continuous water flow, the sharp, angular edges of the #20 silica sand become worn down and rounded like river pebbles. As grains lose their rough edges, their ability to trap fine silt and organic debris diminishes, leading to shorter filter cycles and persistent cloudiness. If your pool experiences high bather loads or heavy organic debris from surrounding trees, media replacement may be needed every 3 to 5 years.
Why is there sand blowing back into my pool after cleaning?
Sand blowing out of pool return jets usually indicates one of three problems:
- A cracked or broken lateral slot at the bottom of the filter vessel.
- A cracked or improperly seated central standpipe.
- Sand accidentally spilled down the open top of the standpipe during media replacement.
If the discharge occurs only for a few seconds after a sand change, it may be residual dust that needed a longer rinse cycle. If sand continuously accumulates on the pool floor during normal filtration, the filter must be drained and the internal laterals inspected for damage.
Can I use play sand or masonry sand in my pool filter?
No, never use play sand, masonry sand, or builder’s sand in a pool filter. Pool sand filters require specific #20 silica sand with a grain diameter of 0.45 to 0.55 mm. Play sand contains inconsistent particle sizes and fine pulverized rock dust that will pass right through lateral slots, blowing directly into your pool and causing severe cloudiness. Furthermore, the sharp, fine dust will wear down mechanical pump seals and cause blockages in your pool plumbing.
Conclusion
Your pool’s sand filter is the core of your circulation and water care system. By regularly monitoring your pressure gauge, executing 2-to-3-minute backwash cycles with a 30-second rinse, performing an annual chemical degreasing soak, and replacing your #20 silica sand every 5 to 7 years, you can keep your pool water crystal clear throughout the swim season.
At Wally’s Fiberglass Pools, we help homeowners across Sussex, Lake Country, Waukesha County, Milwaukee, and Lake Geneva enjoy hassle-free pool ownership. Whether you need assistance troubleshooting filter pressure issues, upgrading your equipment pad, or planning a complete inground fiberglass pool installation, our local team is here to help.
Ready to optimize your pool equipment or plan your backyard project? Visit Wally’s Fiberglass Pools today to connect with our local pool specialists!